It’s now been a week since New Zealand officially went into a lockdown. How is everyone doing? In our case, despite obvious difficulties like not being able to travel (our main topic!) and putting all photo and video projects with clients and partners on hold, it was really easy to find that silver lining that keeps us happy and motivated.
We’re working a lot, updating our YouTube and Instagram Stories as often as possible. For example, we started sharing short travel video clips on Stories and you seem to really like these virtual travels 🙂 We’re also trying to be more ‘real’ and less ‘polished’ online these days – it really feels like Instagram went back to where it started: people sharing their kitchen masterpieces, pets and happy family selfies. Did you notice that? We’re certainly loving this switch A LOT, though we must admit – being so raw and real is not the easiest task after so many years of running around the world for picture-perfect locations and activities.
We’ve also created and trying to stick to a very healthy daily routine with early wake-ups, workouts and cooking healthy meals. Speaking of healthy meals, this quiet time at home opened up Masterchef talents in so many of us! Are you experimenting with the new recipes already? We thought it would be exciting to share some of the traditional Russian meals with you today. These recipes are something we grew up with, that every person in our home country knows and loves. And what makes this traditional Russian food so amazing (besides it being incredibly delicious) is that it’s super easy to cook. We look forward to your feedback on these dishes – did you like it? Was it easy to cook? Share your Russian meals with us on Instagram!
Traditional Russian recipes
For breakfast: syrniki (a.ka. Russian Cheese Pancakes)
Fluffy, soft and delicious syrniki is something Russian families love to eat for breakfast. They look like little pancakes, only are made of cottage cheese. Syrniki are normally eaten with jam, honey, sour cream or condensed milk.
Syrniki are very easy to cook but, of course, you need to know a few secrets if you want to indulge into a true masterpiece. For example, it’s important to avoid too much moisture in your dough, that’s why Russian cuisine experts recommend squeezing your cottage cheese before adding it to the dough – to eliminate that water excess.
Ingredients for syrniki:
- 500g cottage cheese
- 2 eggs
- 4tbsp sugar
- 100g flour
- a pinch of salt
How to make syrniki:
- Mash the cottage cheese with a fork and add eggs, sugar and salt. Mix properly.
- Add flour and mix again. The mixture should be quite dense but not too much or your syrniki would taste more like pancakes and will loose their fluffy texture.
- Coat your hands with some flour, so that the mixture doesn’t stick, and form a little ball. The amount of mixture you need for one syrnik is approx as much as you can scoop with a tablespoon. Some people prefer to form syrniki on a board powdered with flour, I simply use my hands. Press the ball, so that it looks like a thick pancake.
- Heat the pan, add some butter and put your syrniki in it. Fry them on low heat till they’re golden on one side, then turn. You can close the lid to make them softer and fluffier.
Vegetarian Russian syrniki: I don’t eat eggs, so I simply don’t add them when I cook. But we’re focusing on traditional Russian food and the originalrecipe includes this ingredient. If you don’t add eggs, you might need a little different ratio of flour to cottage cheese to make sure the mixture is still sticky but, to be honest, it doesn’t change a lot.

For lunch: Russian borscht
Russians love soup! In fact, with lunch being our main meal of the day, we quite often eat soup PLUS a second dish that traditionally consists of garnish and meat. We often eat soup for dinner as well. Borscht is probably the most famous Russian soup – it’s hearty, very-very delicious and, thanks to beetroot, looks really pretty. It also consists of very basic ingredients that we always have at home. Cooking borscht requires quite some time, that’s why we mostly cook a lot at once and eat it for several days in a row. By the way, Russian borscht becomes even more delicious on the next day 🙂
Almost every family in Russia has its own borscht recipe. It’s hands down the most quintessential traditional Russian food. Some people just cook all ingredients, I prefer to panfry some of them before that – yes, it takes more time but definitely adds to the flavour! And trust me, you want your borscht flavourful and rich! Also, quite a lot of people add some beans to borscht – that also adds to its overall richness and yumminess.
Ingredients for vegetarian borscht (makes approx. 6 litres):
- 2-3 beetroots
- 1 carrot
- 1 onion
- half cabbage
- 1 red capsicum
- 1 large tomato
- 2-3tbsp tomato pasta
- 1-2 potatoes
- 4-5 garlics
- 1/2 lemon (you cand do without it)
- a bit of parsley
- sour cream to garnish
How to make borscht:
- Slice the onion, thinly slice the capsicum, grate the carrot.
- Heat the pan and add some butter. Cook the above ingredients on medium heat.
- Chop the cabbage thinly.
- Pour water into a big pan, wait till it boils and add cabbage and the ingredients you’ve just fried. Add salt.
- In the meanwhile, grate your beetroots (sometimes I just chop them – that’s also fine. Just make sure the pieces are not too big, otherwise it takes ages to cook them) and fry them in a pan with some butter and add tomato pasta and fresh tomato 3 min before the beetroot is ready. Stew everything together. You can add 1/2 lemon juice to this mixture as well – I don’t always do that. But I love adding a bit of cinnamon – it goes really well with the beetroot.
- Add this yummy mixture to your soup and boil for another 5-7 minutes.
- Chop garlic and parsley and add them to your borscht.
- Turn off the heat and let it sit for 30 minutes.
- Enjoy with sour cream and rye bread 🙂
Again, because I’m lactovegetarian and don’t eat meat, I’m sharing vegetarian borscht recipe that I love cooking. Traditional Russian borscht, of course, includes meat. If you want to cook traditional borscht, you’ll need 400-500g of pork or beef meat on bones that you’ll need to cook for 1,5 hours for a hearty, delicious broth.
For dinner: pelmeni
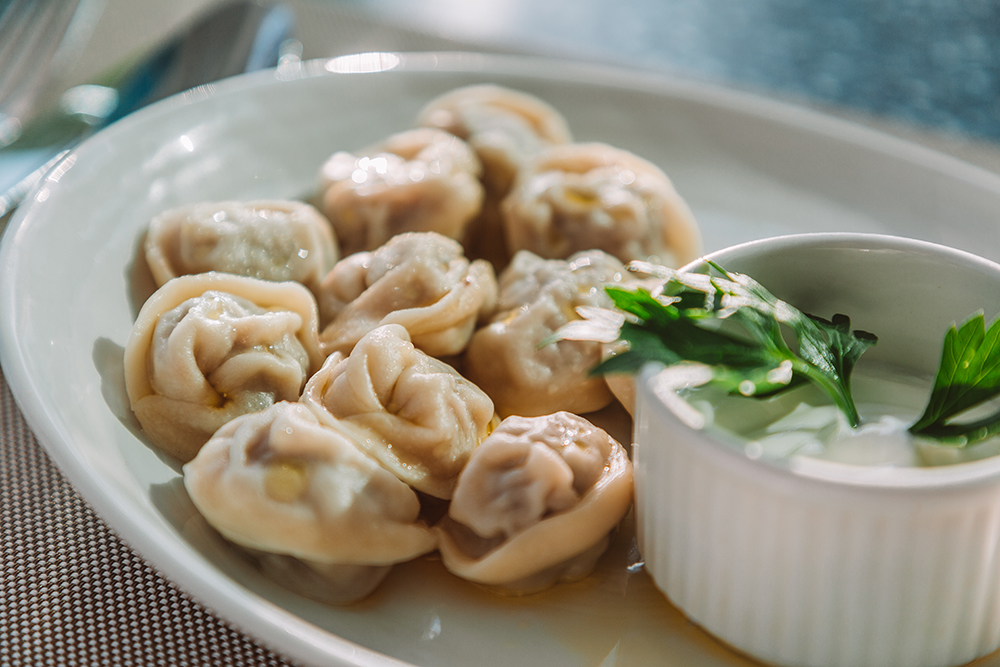
Pelmeni are basically dumplings, – only boiled, not fried. Or ravioli – only Russian, not Italian 🙂 Traditional Russian pelmeni are cooked with beef&pork mince stuffing but there are also vegetarian options, known as vareniki (or ‘pirogi’ in Western Europe). Vareniki can be stuffed with potatoes, pumpkin, mushrooms or even something sweet, like cherries or cottage cheese. But let’s get back to pelmeni!
Ingredients for pelmeni:
For dough:
- 600g flour
- 250ml water
- 1tsp salt
- 1 egg
For filling:
- 250g pork mince
- 250g beef mince
- 2 onions
- 1/2 capsicum (not necessary)
- salt & pepper to your taste
How to cook pelmeni:
- Add 1tbs of water, a pinch of salt and egg to the flour. Carefully start mixing and keep adding a bit of water every now and then.
- Work the dough until it comes together. It should be a solid, one-piece mass.
- Now to your filling – mix two types of mince with onions and capsicum. Ideally, grate vegetables in meat grinder or use blender before adding them to the meat. Add salt and pepper and mix everything. Some people recommend to fry onions beforehand, I don’t normally do that.
- Now cover the table or large chopping board with flour, take half of your dough and roll the dough till it’s approx 2mm thick. Take a cup and press it into a dough to form identical circles that are approx 6cm in diametre.
- Put a teaspoon of your filling in the centre of each circle.
- Carefully seal the circle around the filling to form half-moon. At this point, your pelmeni should look like dumplings. BUT we’re not done here yet! Now take the two furthest from each other corners and seal them together. Sorry for this analogy but it should now remind a diaper 🙂 It’s quite difficult to explain the perfect pelmeni shape…
- You can keep the excess of pelmeni in your freezer, by the way. Just make sure they’re not touching each other when you first freeze them, otherwise it will be impossible to separate them later.
- Now boil the water and add a little piece of butter, salt and pepper and a couple of bay leaves (if you have them). Add pelmeni and stir the water slowly, so that they’re not sticking to each other. If you plan to cook A LOT of pelmeni, add them in parts, not all together. When they rise to the surface, they’re almost ready. Boil them for additional 2-3 minutes and remove from water.
- Serve with sour cream and green onion or parsley!

These are just three of the most well-known traditional Russian food ideas. Russia has a very long and rich history, so it goes without saying, Russian cuisine is very diverse and reflects different regions and different historic times. We don’t often share food articles and I doubt we’ve ever shared recipes in the history of this blog. But let us know if you like this format and we’ll share more!
Liked this post? Pin it!


